Recently, I set up a virtual server on my home network. This gave me an opportunity to practice some of my existing skills such as: operating system installation, virtual machine deployment and administration, and server administration, and to gain some new skills along the way. This server can also now serve as a platform to deploy different services on my home network in the future. It was a lot of fun, and a great way to push myself to keep learning new things and improving existing skills
Host and Hypervisor:
For my host machine I used my computer running Windows 11 Pro. While I considered other options, I decided to use my Windows 11 computer because it allowed me to use Hyper-V as my hypervisor. I chose Hyper-V as my hypervisor because I recently learned it, and want to gain more experience with it. Additionally Hyper-V can run in the background of my computer. It does not matter if my computer is locked, or if I am logged out, the server will continue to run. Further, if I turn off or restart my computer, Hyper-V can be set to save the state of my virtual machine and automatically restart it when the computer boots up again.
Server Selection:
I chose Ubuntu Server for my virtual machine’s operating system. Normally I work primarily in Windows Server. However I do not want to limit my experience and knowledge. Ubuntu Server is a distribution of Linux. This allows me to add to my skill set while reviewing general concepts I am already familiar with.
Download Ubuntu Server:
To start this project the first thing that I did was download the Ubuntu Server iso file. It can be found here: https://ubuntu.com/download/server. After successfully downloading the iso file, I moved it to a folder I use specifically to store iso files. This made it easy to find later on, and helps keep my computer organized.
Hyper-V Installation:
To install Hyper-V on Windows 11, I simply opened the Windows Features menu in the control panel, located Hyper-V in the feature tree, ticked the box next to it, and hit the “OK” button. Last but not least, I restarted my computer. After restarting my computer, Hyper-V was installed and ready to go.

Building the Virtual Switch:
Before building the virtual machine itself, I first needed to create a virtual switch which the virtual machine would use to access the network. To do this I selected the host machine under the navigation tree on the left side of the window, then in the actions pane I clicked on the Virtual Switch Manager. When the Virtual Switch Manager opened, it immediately provided the option of creating a new virtual switch. Because this virtual machine needed to be on the same network as all the devices which need to access it, and needed to be able to access the internet, I set the type of virtual switch as External. Then I simply clicked “Create Virtual Switch”. This opened up the properties for my newly created virtual switch. The first thing to do was to name the virtual switch I just made. I like to keep my naming conventions simple and right now I have no other switches so I am simply named it “external network”. Next I scrolled down to connection type, and ensured that the correct network type (in this case an External network) was selected. Then I selected which network interface from the host machine should be used to reach the network. Lastly, I clicked the box next to “Allow management operating system to share this network adapter”. At this point my virtual switch was up and running, which would allow the virtual machine, soon to be created, to connect to the same network as my host machine and the greater internet as needed.

Building the Virtual Machine:
Next it was time to create the virtual machine itself, luckily the New Virtual Machine Wizard was simple and helpful. To begin, I selected the host machine in the navigation tree on the left, and then in the actions pane I clicked new>Virtual Machine. Immediately this launched the New Virtual Machine Wizard which walked me through the process of creating a new virtual machine. On the “Before You Begin” page, I simply clicked next. After that I needed to name the virtual machine I was creating and specify the location for it. I named my virtual machine UBUNTU-SVR. As for the location, I used the default location (C:\ProgramData\Microsoft\Windows\Hyper-V\).

Next I had the option of whether to use a generation 1 or generation 2 virtual machine. I opted for a generation 2 virtual machine which will allow me to use some newer virtualization features later on.

The next page was the memory allocation. In my case I allocated 4GB which should be more than enough for the few services planned for this virtual server. I also chose to dynamically allocate memory. Dynamic memory means that instead of using all the memory the virtual machine is allotted, the machine will instead only use what it actually needs at any given point, saving resources.

Following memory allocation, was the networking configuration. Here I selected the previously created virtual switch (named External network).

The next step was connecting a virtual hard disk (VHD) to the machine. There were three options: create a virtual hard disk (this is what I did), Use an existing virtual hard disk, or attach a virtual hard disk later. I selected “create a virtual hard disk” as I did not have one already made. I named the VHD Ubuntu-svr, and allocated 25 GB of storage. This helped preserve system resources on my host machine, and it should be plenty of space for the future projects. If this turns out not to be enough space, I can always increase the size of the VHD later. As for the location of the VHD, I again went with the default location.

Finally, I selected how to install the operating system. There were three options: “Install an operating system later”, “Install an operating system from a bootable image file”, and “install an operating system from a network-based installation server”. I chose to “Install an operating system from a bootable image file”. Next I needed to find the location of the Ubuntu Server iso file I downloaded earlier. This is where moving it from downloads to a dedicated storage folder came in handy.

After I finished selecting the iso file I reviewed all my virtual machine settings and clicked finish. At this point the virtual machine was successfully created!

Before I could start the virtual server I did have one last task to complete. I needed to change the secure boot settings. I selected the newly made virtual machine and on the left side pane, under the virtual machine’s name I clicked settings. This opened up all the settings for the virtual machine. I needed to adjust the secure boot setting, because by default it was set to Microsoft Windows. This virtual machine will not be running Microsoft Windows, so if I left this setting as it was, the virtual machine would not boot properly. So under the Template drop down menu I selected “Microsoft UEFI Certificate Authority”. Once completed I simply clicked apply and ok. The virtual Machine is now ready to boot.

Starting the Virtual Machine:
To begin I needed to connect to and start the virtual machine. To do this I simply selected the virtual machine in the center pane, and on the right side pane under the virtual machine’s name I clicked the connect option, a window then popped up connecting me to the virtual machine. In the center of the new window, there was a button which said start. After I clicked it, the machine booted up.
Boot Options:
The first screen was the available boot options. “Try or Install Ubuntu Server” was highlighted by default and was exactly what I needed. So I simply pressed enter to select the highlighted option and the system began to boot.

Language and Keyboard Selection:
The next screen was used to select the language I would install. Before I move on, I should note that, throughout the entire installation process, the mouse was not used, and would not function as an input device. Everything was done using the keyboard. I went ahead and selected the language I would use, English, and pressed enter.

On the next screen I was given the option of updating the Installer before continuing. I opted not to upgrade the installer and selected “Continue without updating”. Next l selected the keyboard. On this page, the Layout referred to the language of the keyboard, the variant referred to the specific keyboard to be used. For most people that would be QWERTY which here was called “English (US)”. I prefer to use English (Dvorak), so under variant I chose that option. Once I finished selecting my preferred settings, I will selected done and pressed enter to continue.

Installation Type:
Here I was able to select the installation type. The options given were “Ubuntu Server”, or “Ubuntu Server (minimized)”. For this project I chose Ubuntu Server. I had enough storage space and would be logging in and out of the server to set up and configure services fairly frequently in the future. At this point I chose not to “search for third-party drivers” as this was not needed.

Network Configuration:
Next was the network configuration. Ubuntu Server automatically detected the virtual machine’s network adapter and used DHCP to get an IP address automatically. Because the virtual machine was going to be providing services to my network, I needed to give it a static IP address. To do this, I clicked up to the network adapter (labeled eth0) and pressed enter. I then clicked “Edit IPv4” which pulled up the IPv4 method.

I changed the method to “manual” to set up a static IP address. Explaining the networking involved in this and how to determine what IP address to use etc is outside the scope of this post, so instead I will simply share the settings which I used. 10.0.0.0/24 was the subnet (Network ID and subnet mask in CIDR notation) the IP address was 10.0.0.15, the default gateway was 10.0.0.1, the DNS server was 10.0.0.9, and at this point I did not need to set up a search domain. After making these changes, I clicked save, waited for the network settings to update, and then moved on.
Proxy Configuration:
Next I was given the option to configure a proxy to connect to the internet. I did not have a proxy server set up, so I chose not to use one. Instead I simply clicked the Done button and continued to the next page.

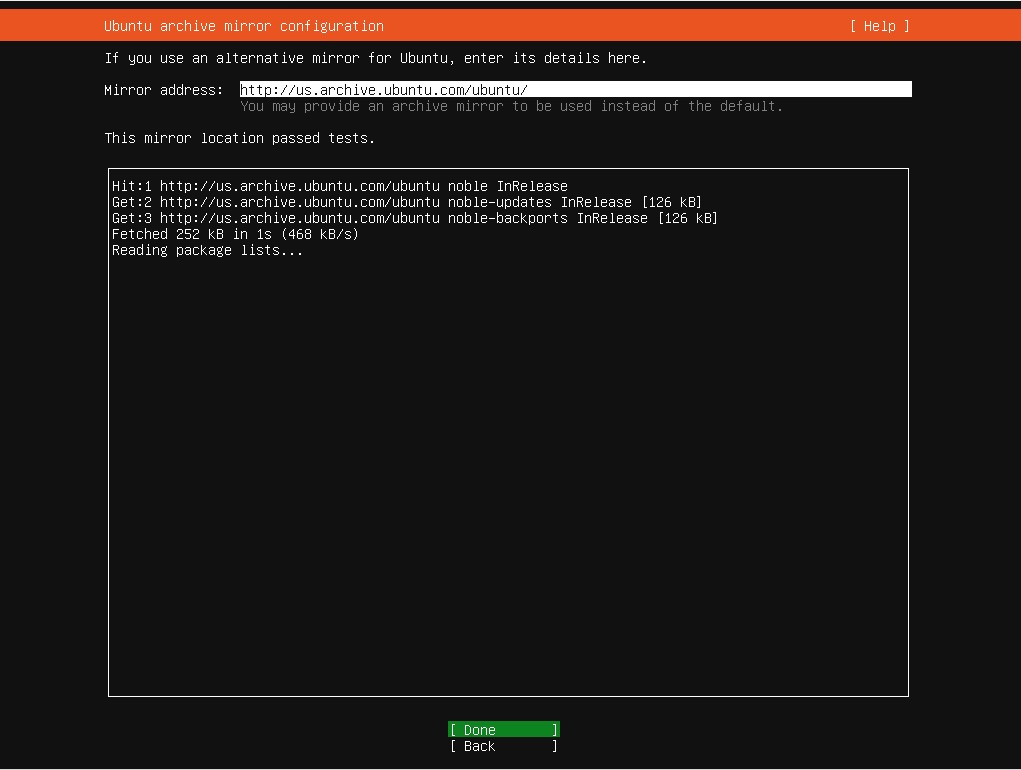
Ubuntu Archive Mirror Testing:
On the next page, the installer automatically ran tests on the default mirror location. When the tests were completed, the message, “This mirror location has passed tests.” appeared, and I was able to move on.
Guided Storage Configuration:
Next I configured the storage. Because the virtual hard disk I used was custom built for this project and I did not need any additional partitions. Therefore I ensured that “Use an entire disk” was selected. Beneath that I deselected “Set up this disk as an LVM group” LVM stands for logical volume management, and has some great features. However, I chose not to use it at this point. Perhaps later I will write a post discussing LVM, and how and why to use it.. After I deselected the LVM group option, I moved on to the next screen.

Storage Configuration:
At this point I was shown how my virtual hard disk would be partitioned. At this point my virtual hard disk would be partitioned such that it would have a ~1 GB boot partition called “/boot/efi” and a ~24GB root partition called (labeled as “/”). When I clicked done, I was warned that this action will result in the loss of any data currently on the virtual hard disk and the installer asked if I wanted to continue. The disk I used was custom made for this virtual machine and was blank, so I simply continued with the partitioning and moved on.

Profile Configuration:
On the next screen, I input all the information related to my profile. This included: my name, the name of the server, my username, and a password.

Ubuntu Pro:
After this, I was given the option to upgrade to ubuntu pro. This would have been free, provided more support, security patches, and a few other things. While Ubuntu Pro certainly has some advantages, I decided not to upgrade at this time. Later if I decide I want to upgrade to ubuntu pro, I can simply run the command “pro attach”.

SSH Configuration:
Next I was given the option to install OpenSSH. I went ahead and did this, so that I could access the virtual server remotely after I completed the install. At this point I did have to allow password authentication over SSH. I did not currently have any keys which I could import for authentication. However, if I did have any keys I wanted to import, this would have been the time to do so. Options for importing keys included: github and launch pad. Later I will write a post on setting up private key authentication for SSH but for this project it was not important. If I were going to make this server accessible from outside my network, then it would be very important to set up key authentication. This would provide much better security. However at this point that was not the case and password authentication is acceptable.

Featured Server Snaps:
The next screen gave me the option to choose different packages to install along with the core operating system installation. At this point I did not select any of these packages, but some of them are quite useful. Instead as I install and configure packages in the future, I will make new posts, giving each package the attention it deserves. At this point though, I simply scrolled all the way to the bottom and selected done.

Installing the System:
At this point I was almost done. The system was set to automatically begin the installation. I simply had to wait for it to finish the preparations, and then click “Reboot now”. After clicking “Reboot now”, I was asked to remove the installation media and hit enter. Because I was using a virtual machine, I did not have to worry about removing an installation media and instead simply clicked enter. After this the server rebooted, loaded the login page, and the installation of Ubuntu Server was complete.
Conclusion:
This project was a ton of fun and super easy. I love how easy it can be to set up a virtual server and start adding services to your network. It was a great way to solidify some of the skills I’ve been learning. I hope you enjoyed following along, and I look forward to sharing more as I keep learning and growing my skill set.